Blog on project development
- jianye hong
- Feb 19, 2023
- 6 min read

Hi guys! This will be my last blog of the semester as i have FINALLY completed my project and I can't wait to share with you my entire project development journey. It's been a blast since I start recording my learning activities here.
In this page, I will
1.Briefly describe my team chemical device
2.Show how the team planned, allocated the tasks, and executed the project.
3.Document the entire design and build process of the chemical device and include videos, pictures, and screen captures of the processes.
4.Include “Hero shot” of every milestone of the processes, example the part A that was 3D printed, part B that was laser-cut, electronics components moved/worked according to the program. Hero-shot is taken with the person-in-charge holding/working/making the parts.
5.Include the name of the person who was in-charge of every part of the project.
6.Document my individual contribution to this project.
7.Provide the link to the page of the blog of my teammates.
8.Describe problems encountered and how the team solved them.
9.Include all the project design files as downloadable files.
10.Embed the final prototype design file, i.e., the final fusion360 design file showing the entire prototype.
11.Type my Learning reflection on the overall project development.
1.Our team Chemical Device
In this section, I will briefly describe my team chemical device.
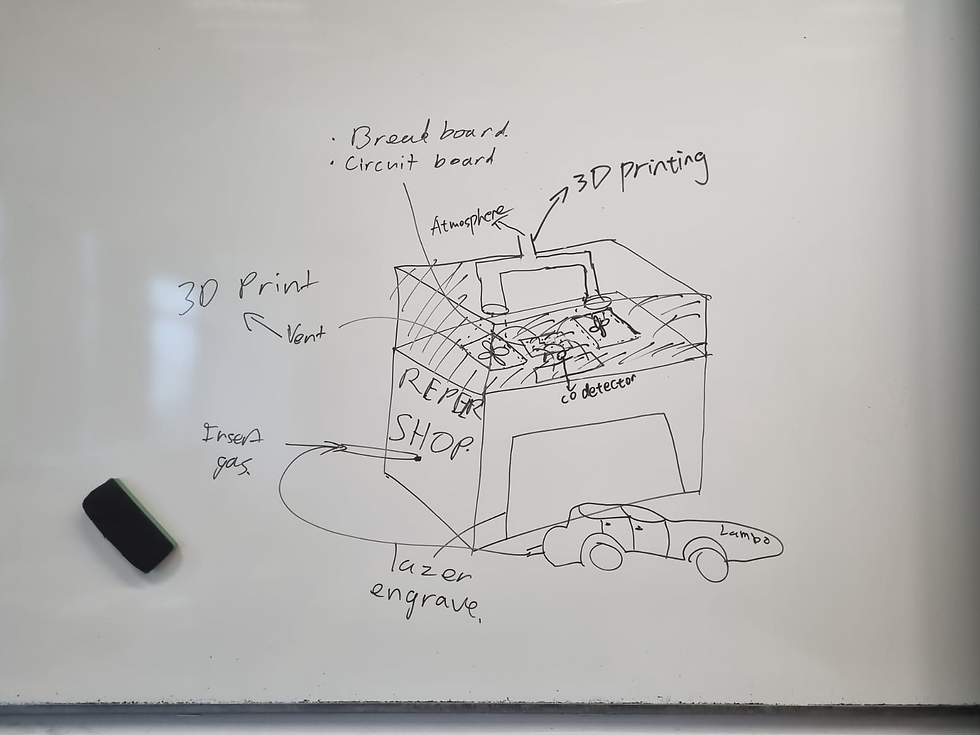
My team's chemical device is a CO detection system which is able to detect the presence of carbon monoxide in the air in a car repair shop and blow it out with the aid of CO detector and a fan that is programmed using Arduino kit. As the CO level in the air exceeds the predetermined value, the sensor will send a signal to the Arduino Kit, which thereafter starts the fan and discharge the air to the atmosphere through the vent. Moreover, as the fan is working, the LED in the car repair shop will start blinking to signal that the system is working.
I almost forgot to mention that our chemical device also has a mechanism involving the use of gears. The front door of our car repair shop is 3D printed and it is open/closed through the gear on top of it.
Video of our chemical device
What it is. What problems will the chemical device solve?
Before I further describe my team's chemical device, let me give you some background infromation on carbon monoxide.
Concentration of CO in the air and its harm to human

Concentration of CO in car repair shops
Carbon monoxyde (CO) exposure is an occupational hazard for car mechanics. Following two cases of CO poisoning and a preliminary environmental assessment of four car dealerships, a descriptive study was initiated in 76 car dealer repair shops in the Quebec City area to evaluate CO exposure. Alveolar CO of 496 mechanics and ambient CO in 47 car dealer repair shops were measured: 44.6% of non smoker workers had an alveolar CO level greater than 27 ppm which is equivalent to a 5% level of carboxyhemoglobin (HbCO). Ambient CO was greater than 35 ppm in 42.6% of car repair shops, a level considered a risk for chronic health effects. The following measures were proposed to car dealership owners to reduce mechanics' exposure to CO: 1) Install or improve local or general ventilation systems, 2) improve the layout of the repair shops, and 3) prohibit running of car engines without proper connection to the ventilation system.
Problems that our prototype tackles
As mentioned earlier that car repair shops generally have unhealthily high concentration level of CO present, posing chronic health problems to the workers. Our prototype effectively resolve this problem by installing a local ventilation system that not only detects the presence of CO, it also discharge the air with high CO to the atmosphere with the vent. As a result, the CO level in car repair shops will be maintained at a safe level all day long, creating a conducive working environment for the workers.
Below is the hand sketch of the chemical device.
Initial sketch of the product
Initial dimension of our product

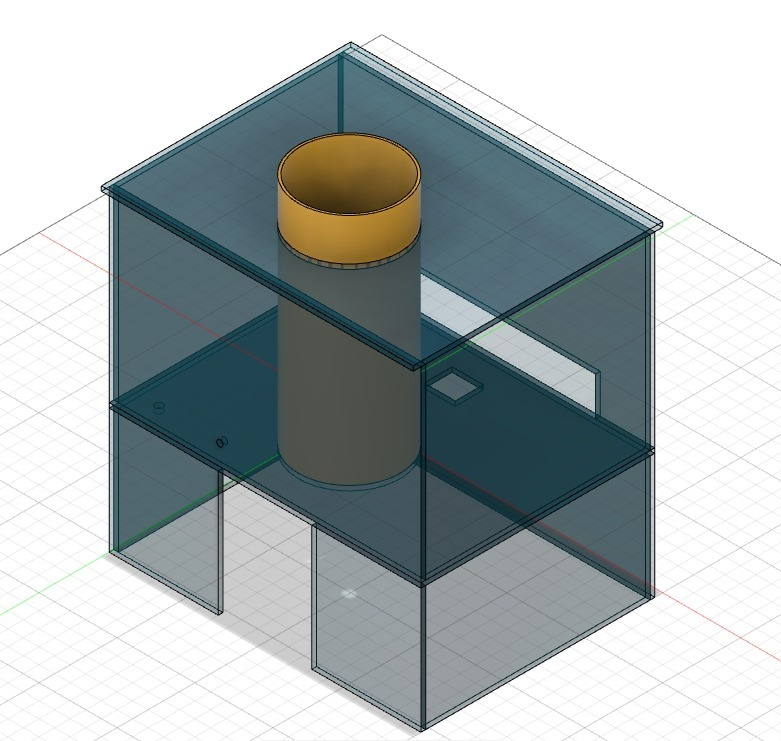
Final sketch of the product
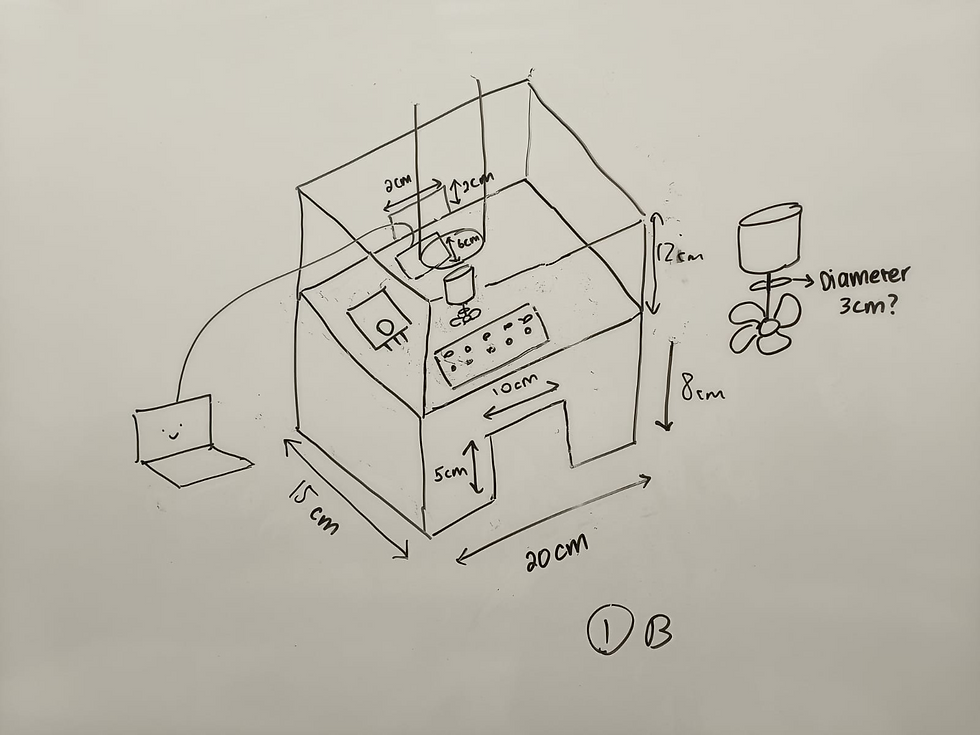
Final dimension of our product


Due to limited resources for the prototype, we had lesser space to work with as we were only given a single acrylic sheet (3mm thickness, 800mm x 420 mm). Therefore, we elected to downscaled the total number of fans so that our prototype would still have all primary items and features required. For example, our prototype is still able to suck out air containing high concentration of Carbon Monoxide with the aid of CO sensor and fan.
2.Team Planning, allocation, and execution
In this section, I will list down my team member's name and their respective roles (CEO, CFO, COO, CSO)

I will show the FINALIZED BOM (BILL OF MATERIALS) table.

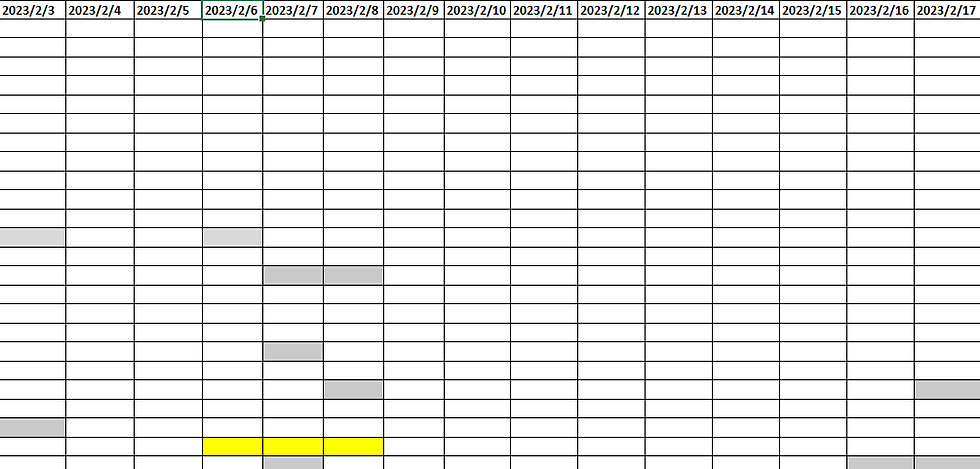
I will show the FINALIZED Gantt chart (planned and actual) and the tasks allocation for each team member
Our FINALIZED Gantt chart (Part 1)

Our FINALIZED Gantt chart (Part 2)

Task allocation
Fusion 360 & 3D printing: Aminur
Laser Cutting: ME
Programming of motor and CO sensor: Diana
Assembling all parts of the system: Jian Lun
3. Design and Build process
In this section, I will provide documentation of the design and build process.
Part 1. Design and Build of Cardboard (done by Aminur).Link it to Aminur’s blog
Documentation for task 1.
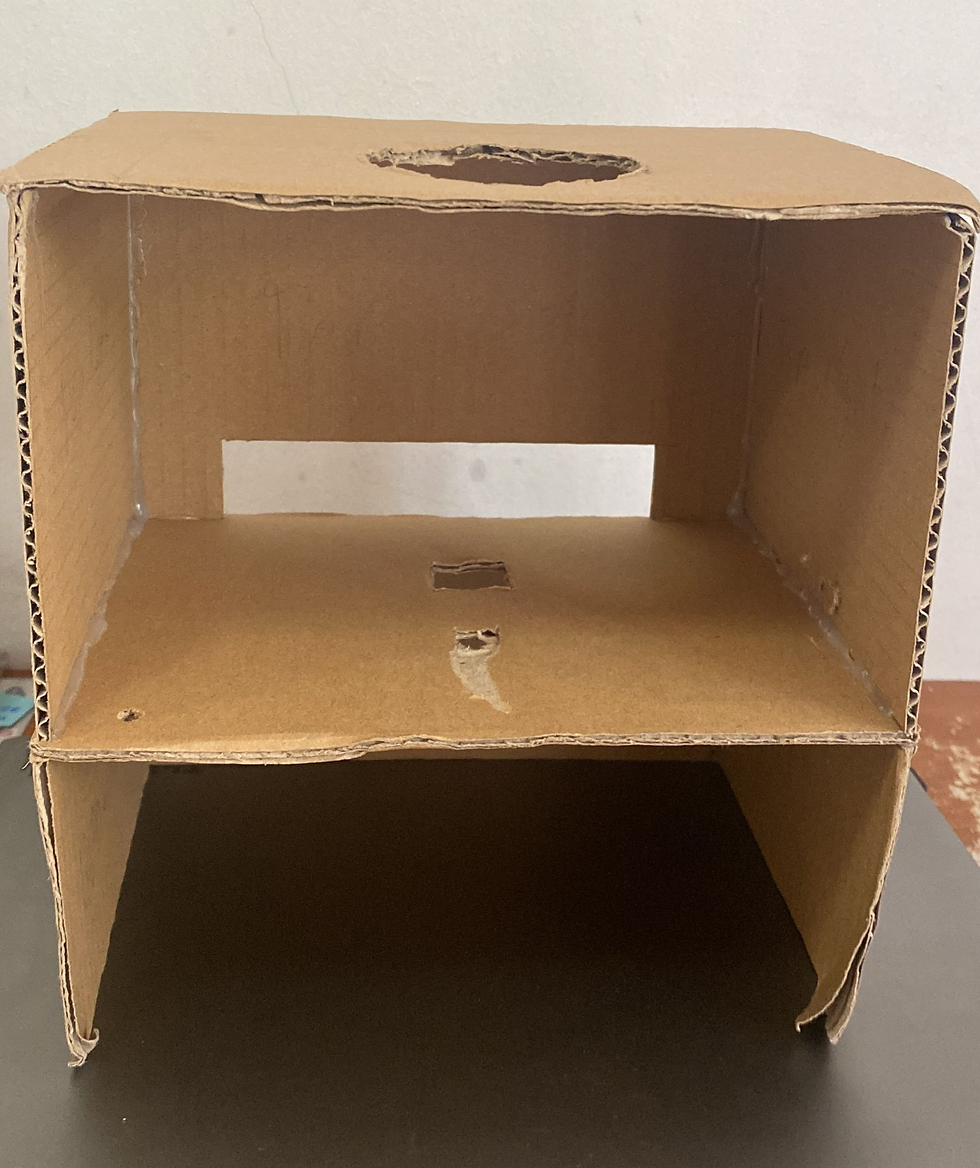
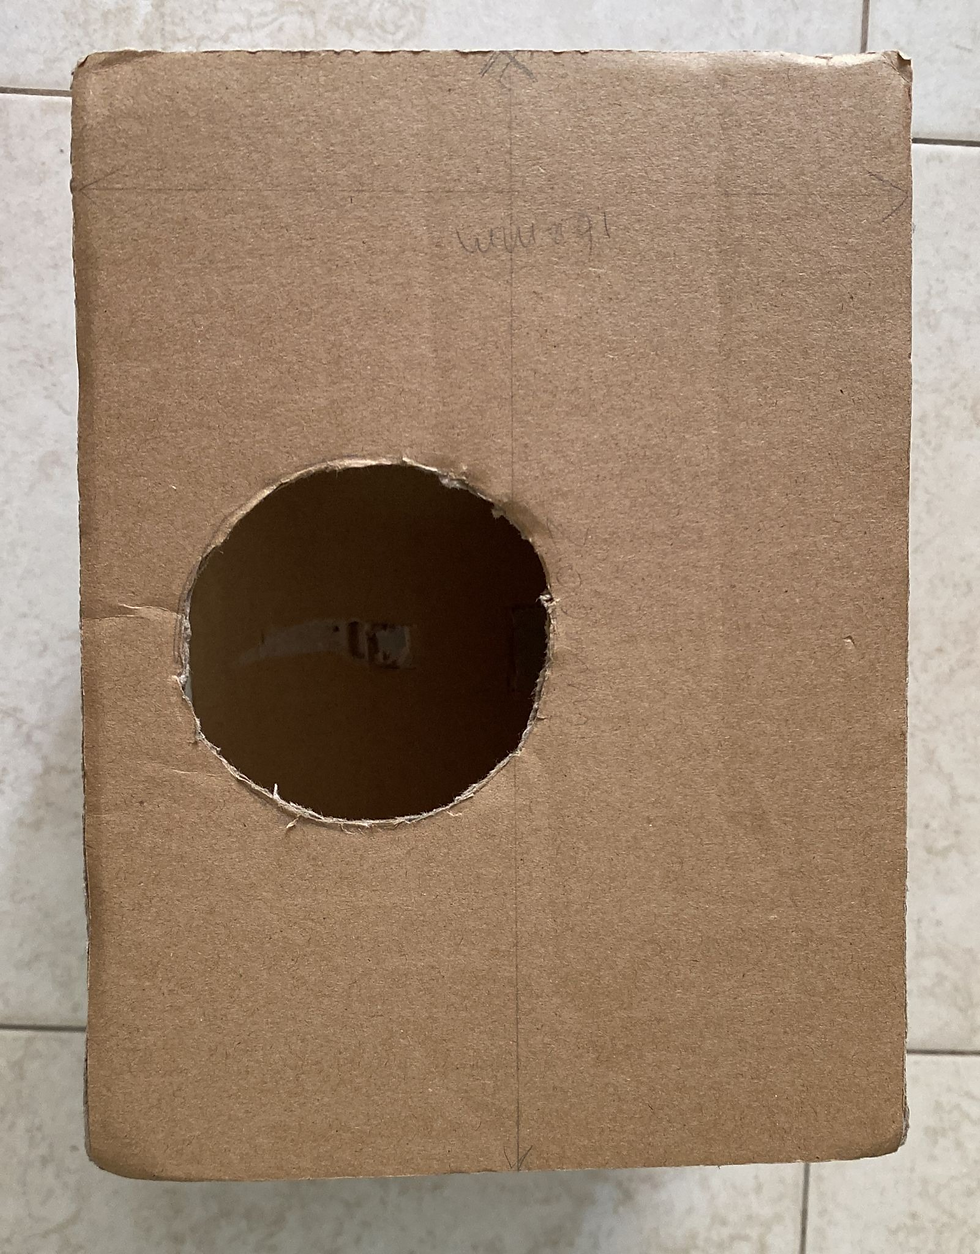
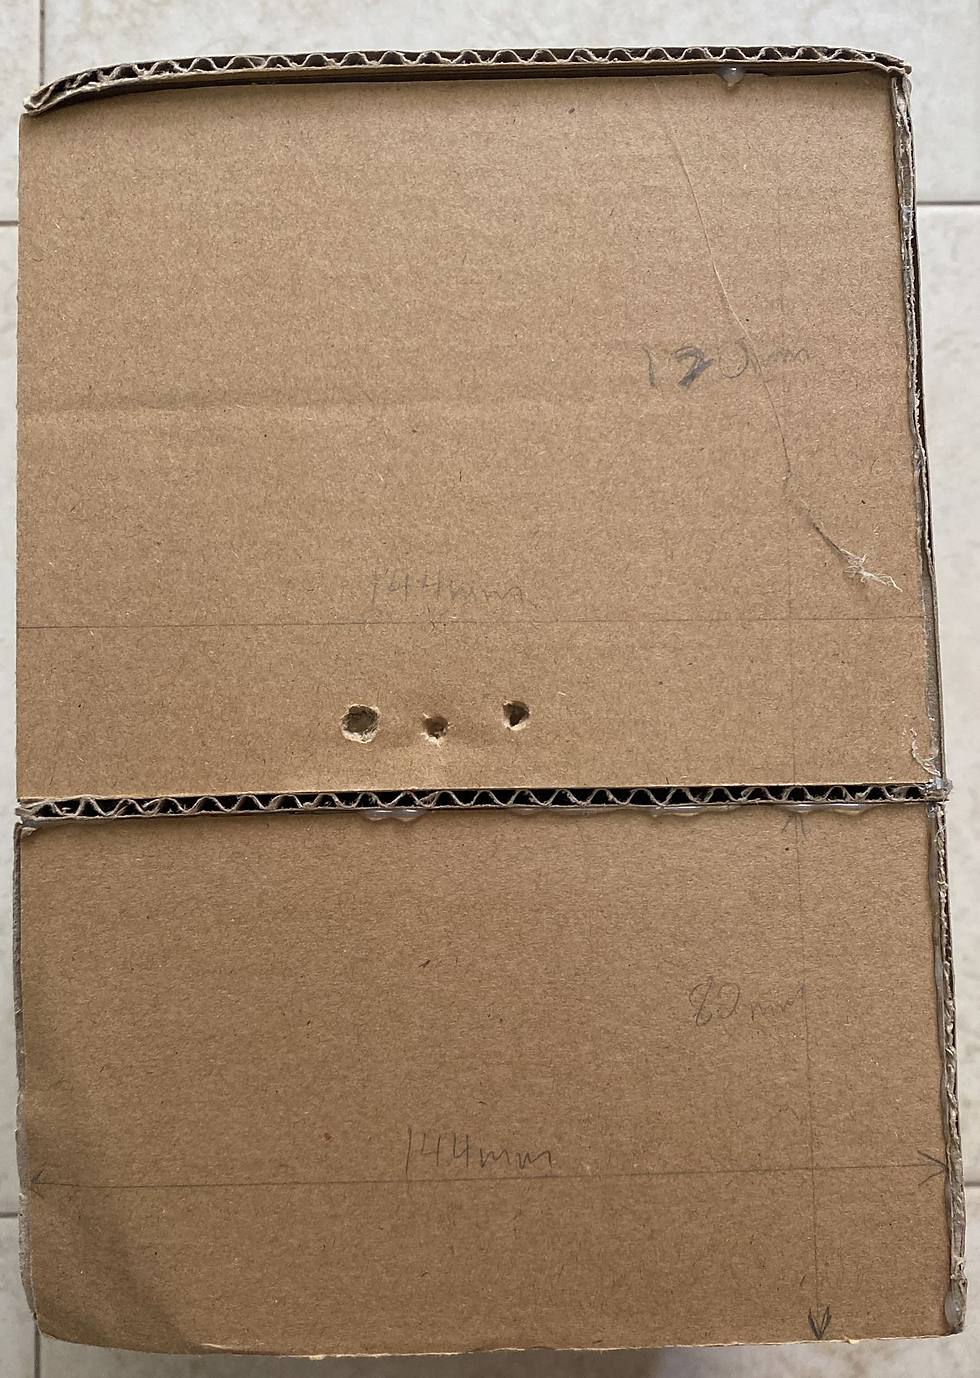
Initially, our group did not intend to make a cardboard. However, on the first day of 3D printing, our group failed to get a 3D printer as all printers were in use by our fellow classmates. Hence, Aminur decided to make use of the time in workshop and make our prototype using a cardboard, which turned out to be one of the most important parts in our project development as it gave us an overview of what we wanted to make and we could play around with the cardboard before we proceeded to 3D printing and laser cutting. It also played an important role in helping us determine the dimension of our prototype.
Link to Aminur's blog: https://aminur1080.wixsite.com/cp5070-2022-2a01-gro/post/project-development
Hero shot for task 1
Part 2. Laser Cutting (done by ME, Iron-man).
Documentation for task 2.
Overview of what we are going to laser cut

After sketching the parts that we are going to laser cut using Fusion 360, we have to export them in the form of .dxf and prepare to cut.

We have to book the laser cutting machine using Fablab before we could head to the fablab at the library for laser cutting.

Next, we will be using what we have learnt during the laser cutting practical.
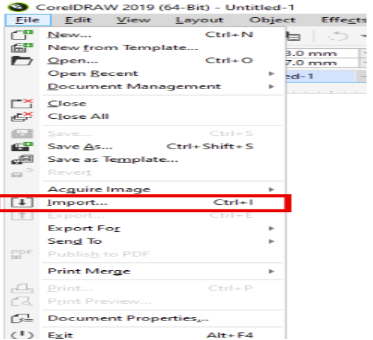
After completing the start-up, we need to import the files into CorelDraw.
Secondly, we need to outline the sketches with RGB red (Red:255 Green:0 Blue:0) for vector cut.

Subsequently, we will proceed to print by clicking the file > print.

Click the cogwheel for settings

Click on Load for material settings
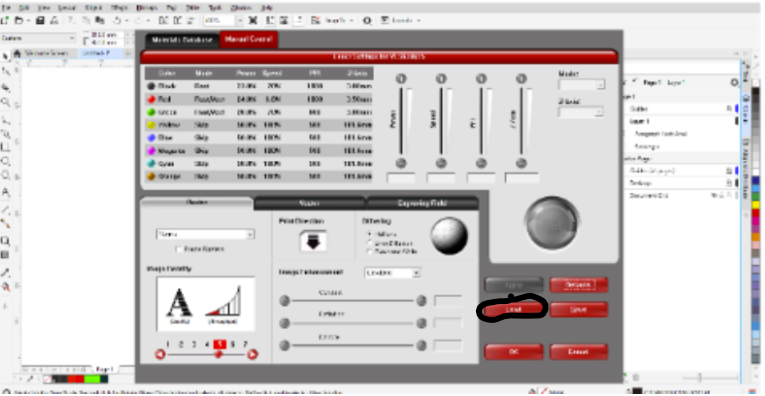
Select the presets that matches your material type and thickness and select OPEN. In this case, we will be using 3mm acrylic sheets.

Check all the important settings are correct before going to UCP (Universal Control Panel).
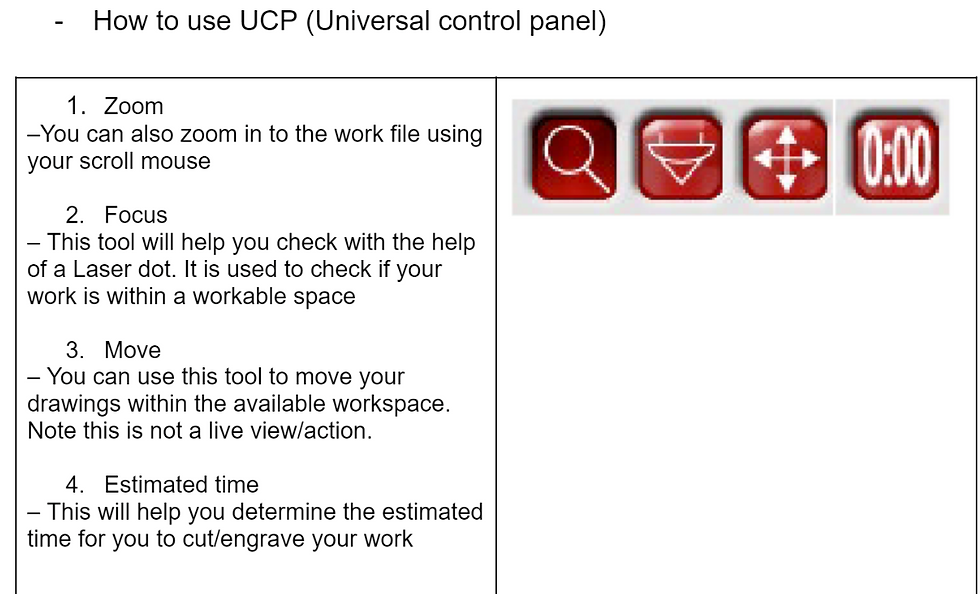
Place the acrylic sheet on the top left hand side of the laser cutting machine.

Use the focus tool to ensure that the acrylic sheet is big enough for cutting.
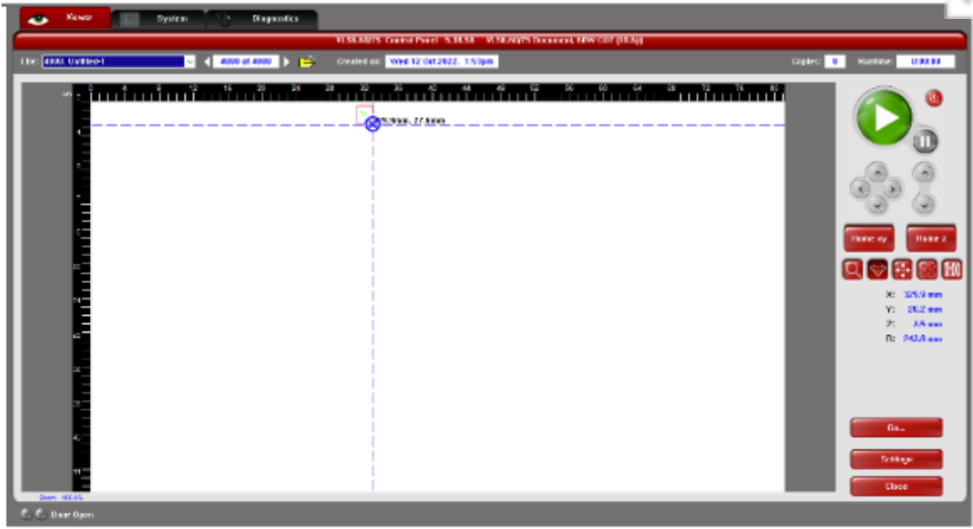
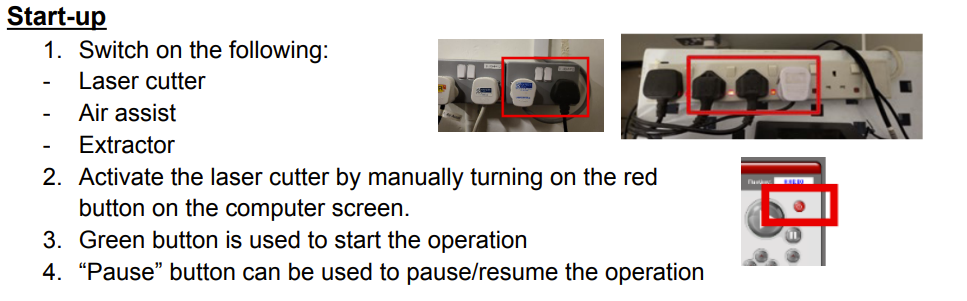
Shut the lid gently and press either the play button on UCP or the physical button on the laser cutter.

Post-operation
Once done, do not lift the lid immediately, let the extractor remove the smell & particles first. Wait for 1 minute before lifting up the lid!
Once the extractor is done, gently lift up the lid. DO NOT ATTEMPT TO REMOVE THE MATERIAL YET!
Tap on the cut material to see if it’s free from its main material.
Housekeeping
Remove any unwanted materials and dispose them
Deactivate the laser cutter
Switch off the necessary switches
There is no need to shut down PC
After laser cutting, we need to use acrylic glue to assemble all parts together.
Hero shot for task 2


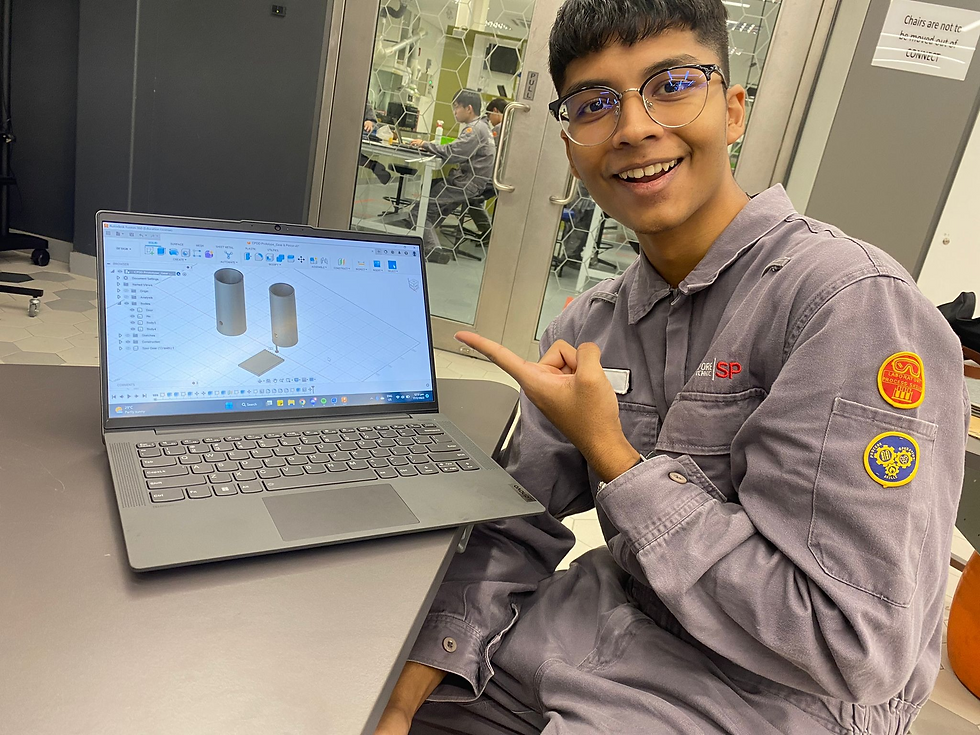
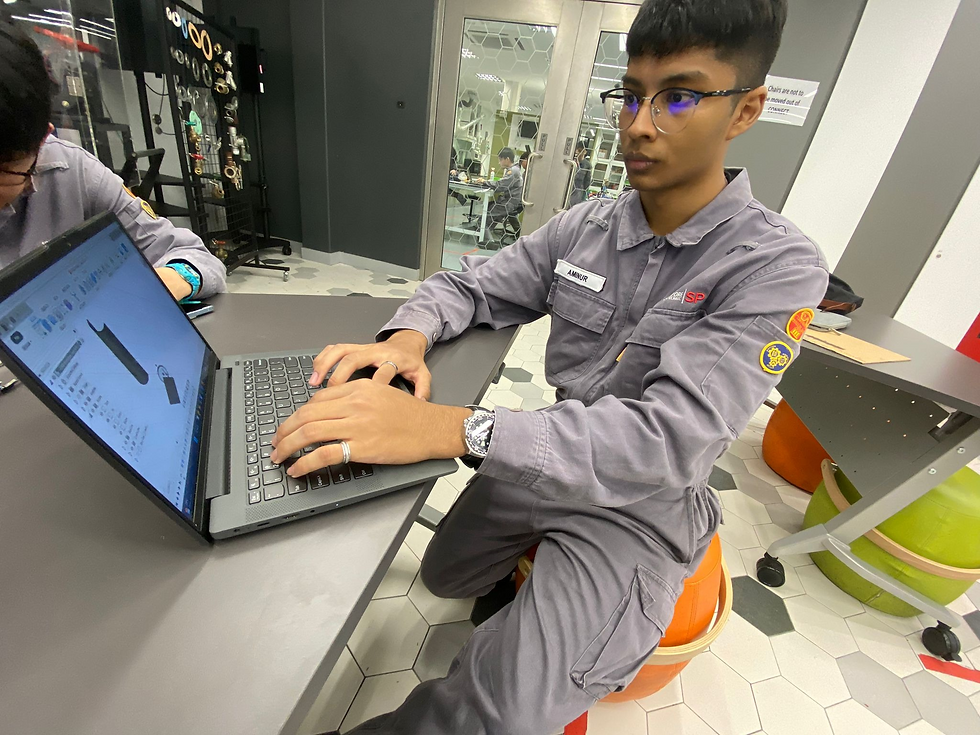
Part 3. CAD using Fusion 360 and 3D printing (done by Aminur).Link it to Aminur’s blog
Documentation for task 3.
Aminur is one of the best at using fusion 360 and 3D printer kudos to the training he went through during NUS egg drop challenge in which he absolutely crushed the competition with his teammates Joel,Jeevan and Yan Zhen.
Link to his blog is at below: https://aminur1080.wixsite.com/cp5070-2022-2a01-gro/post/project-development
Hero shot for task 3.


Part 4. Programming of motor and Icd (done by Diana).Link it to Diana’s blog
Documentation for task 4.
Diana was in charge of programming for our group and she did the coding perfectly combining the code for the fan and the CO sensor. Jian Lun also put in his effort to put the process through.
Link to Diana's blog below
https://cp5070-2022-2b01-group4-diana.blogspot.com/
Hero shot for task 4.


Part 5. Integration of all parts and electronics (done by Jian Lun). Link it to Jian Lun's blog
Embed the finalized fusion 360 design files.
Documentation for integration.
Jian Lun did most of the job for integration. He helped us solve some problems that we faced during the process. Know more about the process through his blog. Link below: https://cp5070-2022-2b01-group4-jianlun.blogspot.com/
Hero shot for integration.


4. Problems and solutions
In this section I will describe the problems encountered in the design and build process and how the team solved them.
Problem 1 and how we solved it (wires getting tangled up during final assembling)
There are too many wires needed to connect between the bread board and the components such as the LED and the motor. Wires tend to tangle up during our final assembling and we had to resolve the issue by changing the placement of our breadboard and arduino kit to create more space to separate each component.
Problem 2 and how we solved it (Laser cutting)
Our initial design on fusion did not take the gap between objects into consideration.
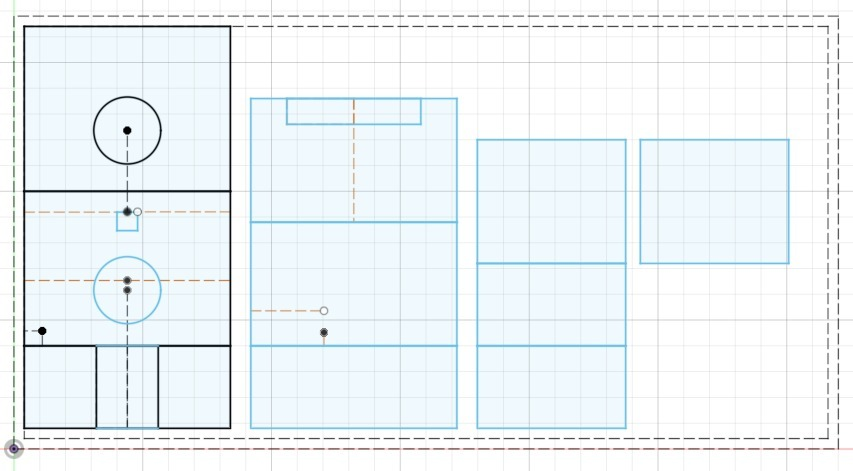
Based on the feedback from other groups, we realised that we must leave some space in between objects that we would like to vector cut. Otherwise the laser cutting machine might not be able to identify the lines in between, resulting in failing to complete the cutting process. Therefore, we had to change our design a little bit by adding space in between every part.

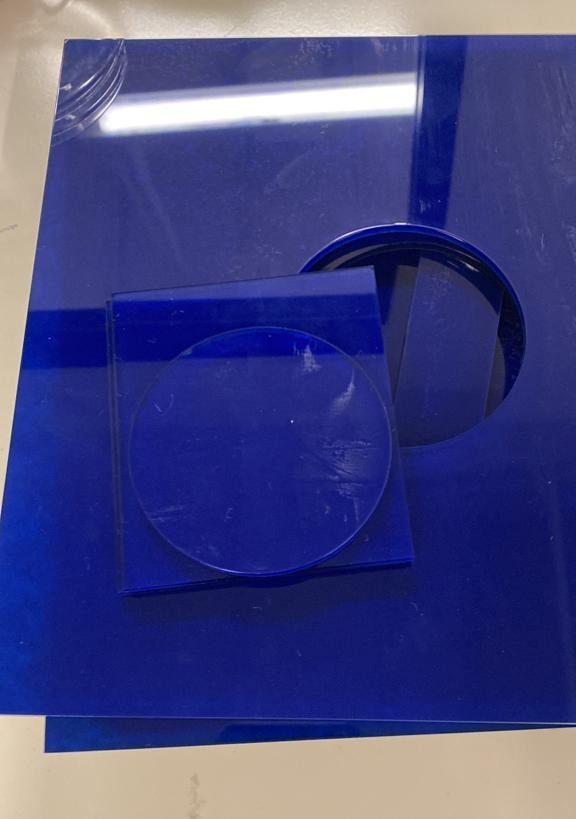
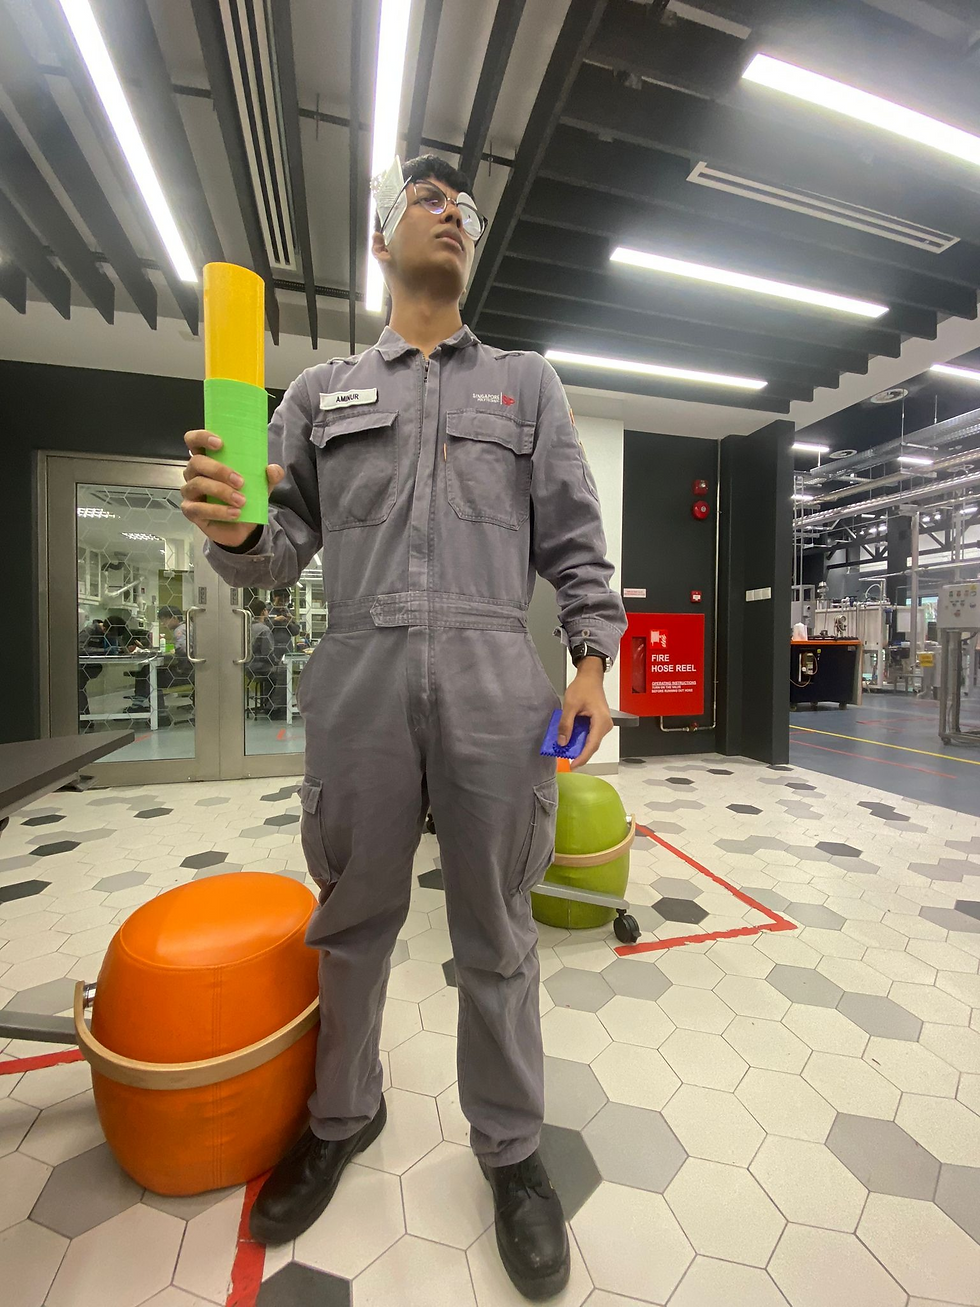
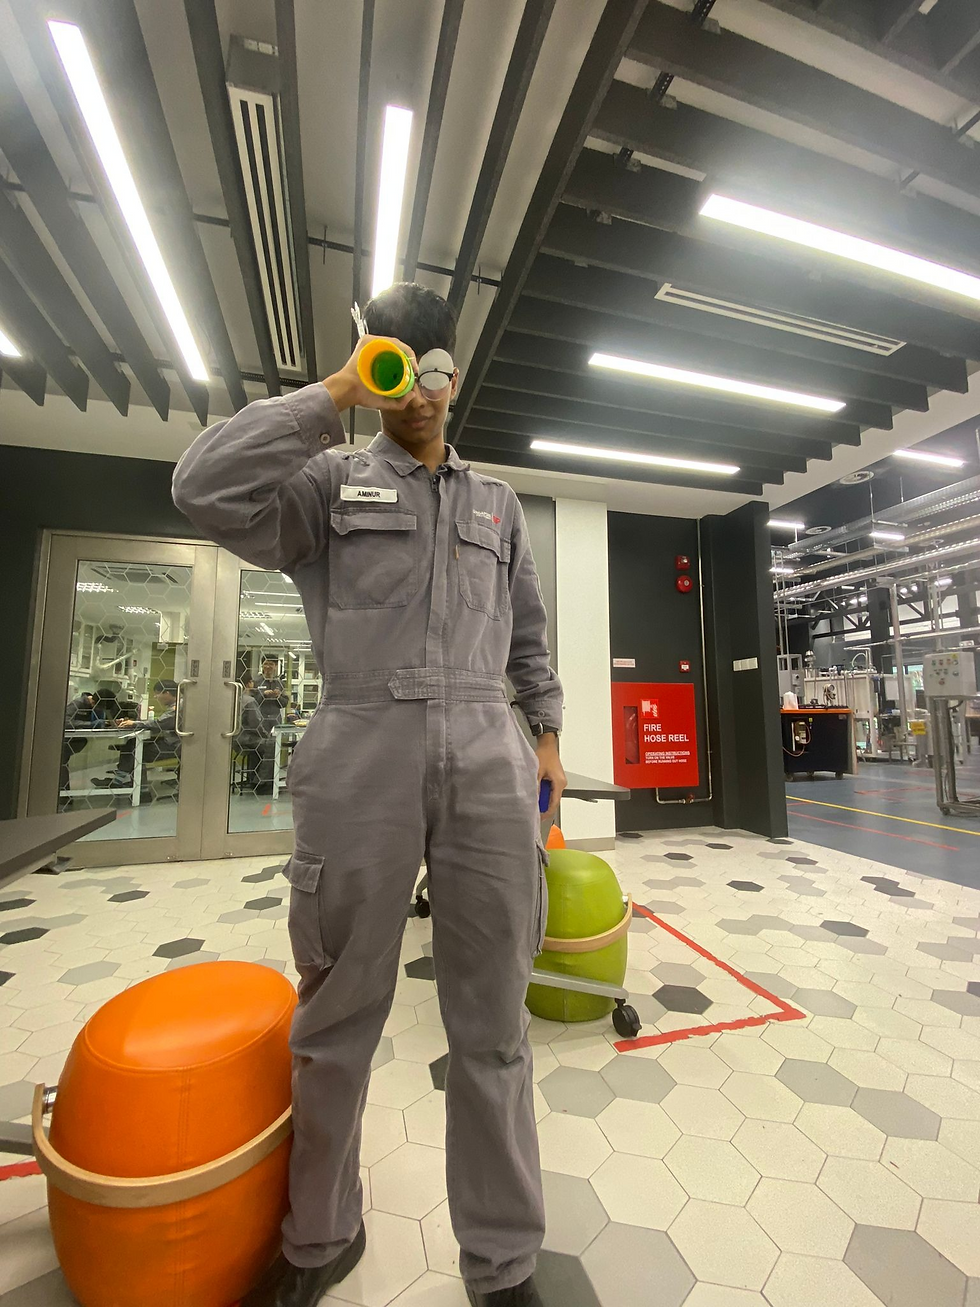
Problem 3 and how we solved it (3D-printed vent could't fit into the holes of acrylic sheet)
The first vent that we 3D printed had a diameter that is larger than the holes we laser cutted. As a result, we couldn't fit it in and we had to 3D print another vent. However, the second vent that we 3D printed did not have a base. The body was hollow, which was undesired as we wanted to have a base to support the motor so that the motor won't fall to the first storey of the car repair shop.
Instead of 3D printing the third vent, we decided to combine the first two vent by cutting some portion of the first vent and put our second vent into the first vent such that the new vent not only has a base, it also can fit in the holes.

The left hand side design is our first vent whereas the right hand side design is our second vent.
Problem 4 and how we solved it (Acrylic glue took very long to dry)
During our first day of applying acrylic glue to assemble our acrylic sheets, the acrylic glue took more than 15 minutes to completely dry out and our acrylic sheets failed to stick in place when we left it overnight in the lab.
We had to redo the process but we learnt from our lesson and we brought the hood that is used to blow the air as close as possible to the area where we applied acrylic glue and we changed our acrylic glue on the second day of our assembling.
It only took an average of 2-3 mins for the acrylic glue to dry out this time and the acrylic sheets were super sticky and held in place strongly.
5.Project Design Files as downloadable files
In this section, I will provide all the design files (Fusion360 files, .dxf files, .stl files, arduino
programs files) as downloadable files.
Link to download all the files in google drive:
The above link contains the following: 1. Arduino programming
2. Laser cutting file (.f3d)
3. Rack & Pinion in fusion 360 (.f3d and .stl)
4. Vent (.f3d and .stl)
Feel free to download any of these files and take a lookat them :)
6.Below is my Learning Reflection on the overall Project Development
To start off, I believe that this final project development has utilised all the skills we have learnt from ICPD and CPDD. From digital modelling using Fusion 360 to laser cutting using laser cutting machine, it is a good practice that covers all aspects of the core skills that we have learnt, let alone mention the use of mechanism with the help of gears.
This activity also makes me realise the importance of having good teamwork in order to finish the project efficiently. We had to split the workload equally so that we can leverage the skills everyone has. For example, Jian Lun and Diana are good at programming and playing around with Arduino. Therefore, they would be in charge of the coding part of the project. Aminur and I mainly focused on 3D printing and laser cutting, as well as the integration of acrylic sheets using acrylic glue. This helped us execute our plan smoothly as all of us were working in our comfort zone.
As the olding saying goes, "no man is an island". Our group met up as a group during brainstorm sessions to generate more ideas. Due to insufficient access to the acrylic sheet, we had to downscaled our prototype and made some crucial changes to our dimension to ensure that our prototype could be made with what we were given. Aminur proposed the idea of reducing the number of fan while Jian Lun and Diana came up with the idea we could squeeze our breadboard and Arduino circuit to save more space.
This whole journey taught me a number of useful troubleshooting skills that I can use in the future. During laser cutting, I realised the file we made beforehand did not take the gap between objects into consideration. As a result, we had to re-design our files to leave a gap in between objects. Another problems we faced was our 3D-printed vent was too tall to fit in and we had to shorten it to fit it in after a few trails. Oftentimes our initial idea or product might not be peferct but we got to keep trying and trying to make it work in the end. It takes heart and commitment on the road to success.
All in all, I feel previleged to be part of this project development after working with my wonderful teammates for several weeks. I enjoyed the grind and I hope I will have the opporunity to work on similar projects in the future. I am pround of myself for having learnt many technical skills and non-technical skills from this project. The next project will be capstone project next sememster and I look forward to applying the skills I have acquired and turning over a new leaf to become a better teammate and individual.
Picture of our team with "Mr Chua"

Peace out!


Comments